Urban life
Since Tokyo is the world’s largest city with its 37 million inhabitants, while also battling land scarcity and high property prices, Japanese architects have no choice but to become very creative in utilizing the tiniest spaces to invent new forms of urban living.
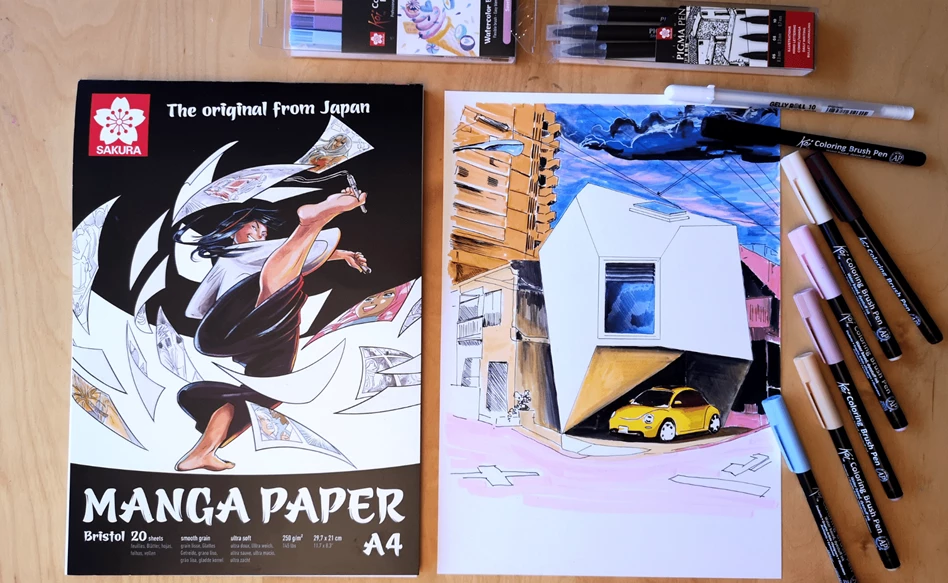
The amazing tiny house in this drawing, for example, can actually be found in downtown Tokyo! This minimalistic building is called the “Reflection of Mineral” due to its interesting shape and bright white exterior. It was designed in this shape because of the client’s wish to have a garage with their home.
Unusual architecture is a great subject for urban sketches such as the one in this step-by-step plan. If you need inspiration, you can find many interesting examples of tiny houses in Japan online!
Step 1
Pick a reference photo to base your drawing off and use the mechanical pencil to sketch it. If you are feeling extra creative, design your own tiny house!
You may want to use a ruler to create crisp, clean lines if your reference photo has a lot of those. For a more dynamic, sketch-like look, you can choose to freehand draw them. Try it out and see which you like best!

Step 2
Once you are happy with your drawing, use the different nib sizes of the Pigma Pen set to add contrast and accentuate the lines.
The ink in the Pigma Pens are great for fine to bold lines in super rich black! Once the ink dries, it is fade resistant and waterproof, so you can work with the water-based brush pens next without worrying about your lines being ruined!

Step 3
Colour in parts of the drawing using the vibrant colours of the Koi brush pen set. With their flexible brush tips and water-based ink, you can create wonderful colour gradients in your drawing.
Use darker shades of the same colour to create a shading effect and use the blender pen that comes with the set to effortlessly blend the colours.

Step 4
Create some interesting visuals in the background like a cloud formation to make the drawing a little bit more vibrant.
You can of course choose to colour in all the elements of your drawing, but you can also leave some areas blank. This makes the drawing much more dramatic and can add a clear focal point.
That completes your tiny house! We hope this step-by-step plan inspired you to create your own version! If you do, remember to share it with us using #RoyalTalens! Have fun!

Other step-by-step ideas

Drawing a turtle with Ecoline Duotip
Step-by-step plan

Drawing a Japanese beetle
Step-by-step plan

