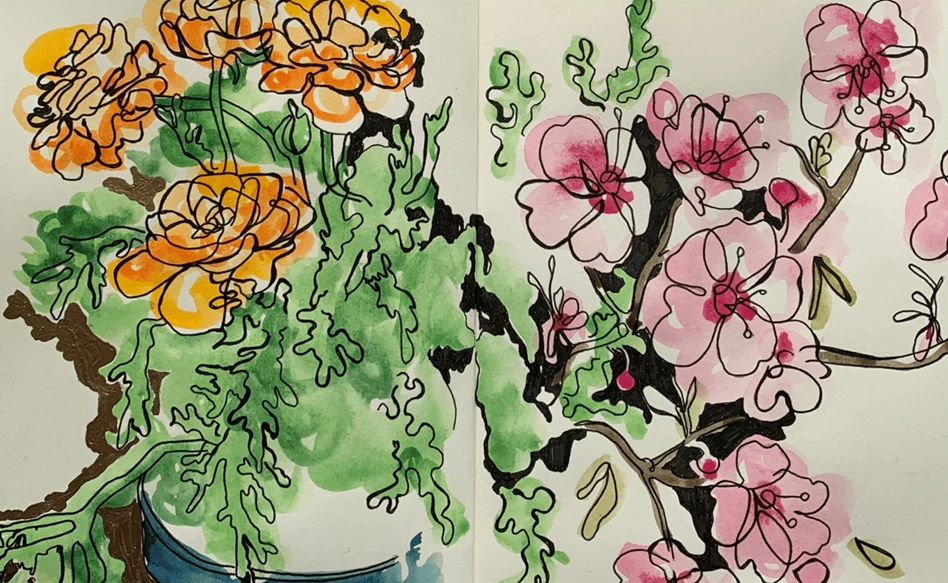
Orange peonies and cherry blossom
Royal Talens was established in 1899 in Apeldoorn, the Netherlands. In 1991, Royal Talens became part of the Sakura Color Products Corporation, a company from Japan. The flowers in this drawing depict the wonderful collaboration between these two companies: cherry blossom to represent Sakura and orange peonies for Royal Talens! Sakura is the Japanese word for cherry blossom, while orange is the national colour of the Netherlands and heavily incorporated into our brand as well. We can't think of a more fitting image!
In this step-by-step plan, Merel Jansen, our technical advisor, shows you how she created this spread of different flowers in a sketchbook! As you can see, the drawing flows over into the next page. This style was inspired by Emakimono, traditional Japanese drawings created on horizontal scrolls. Let’s begin!
What you need
Step 1
Loosely sketch your orange peonies on the left page. You may use a photo reference if you prefer. The sketch doesn’t have to be perfect, it’s about the suggestion of the shape of the flowers and individual leaves.

Step 2
Use one of the orange shades of the Koi water colours and lightly add this to the orange flowers in a wavy shape across the sketch. Don’t be afraid to paint outside of the lines! We want this painting to be flowy and organic.

Step 3
Add around three different shades of orange to yellow to your flowers. The tops of the flowers are lighter and brighter than the undersides, these should be deeper in colour. Paint in a playful way and have fun with it!

Step 4
Use this same technique for the green leaves.

Step 5
Once you are happy with the achieved colours and gradients, trace over your sketch lines using the Pigma Pen. This style is similar to traditional Japanese drawings, using hard contours and shadows. Let the drawing flow over a little bit onto the next page.

Step 6
Embellish the edges using the gold Pen-Touch pen. This adds a royal touch to your work.

Step 7
Now for the cherry blossom: draw your sketch and make sure the lines are loosely drawn on the paper, not too hard and stiff.

Step 8
Select a light pink colour to fill in the flowers of the cherry blossom and use a darker shade in their cores while the paint is still wet to create a nice colour transition.

Step 9
Add some brown and green to the branches and leaves.

Step 10
Use the Pigma Pen once more to line the contours of the flowers. Let the two drawings flow into each other, just like a Japanese Emakimono.

Step 11
Pink and silver make a lovely combination. Use the Pen-Touch in silver to embellish the cherry blossom side of the drawing.

Step 12
That completes your flower water colour drawing! We hope you’ve enjoyed this tutorial. If you try something like this, please let us know by sharing it online using #RoyalTalens.
Did you know Sakura is celebrating its 100th anniversary in 2021? To celebrate this special occasion, we organised a contest in which you can win some exciting prizes with your Japan-inspired art! Read more about it here!

Other step-by-step plans with watercolours

Easy Christmas illustrations
By Trine Holmvard and Gitte Klausen

Heda's still life in Van Gogh water colours
Step-by-step plan
Sumo wrestler
Step-by-step plan
Loosely painted flowers
Step-by-step plan