Loosely painted flowers
Have you ever started your work with just some lines, drops or splotches to see where it leads you? Water colour is ideally suited for this kind of technique. It allows you to set your creativity free, let go of your perfectionism and explore the possibilities. Create outside the lines!
In this step-by-step plan, Justyna Pennards, our technical advisor, shows you how to freely paint with water colours to create these pretty cherry blossoms. Have fun trying out this technique and achieve a great result that you can be proud of. Let's begin!
What you need
- Sakura Koi Water Colors Pocket Field Sketch Box set of 48 colours
- Sakura Koi Coloring Brush Pen in black, light pink and light green
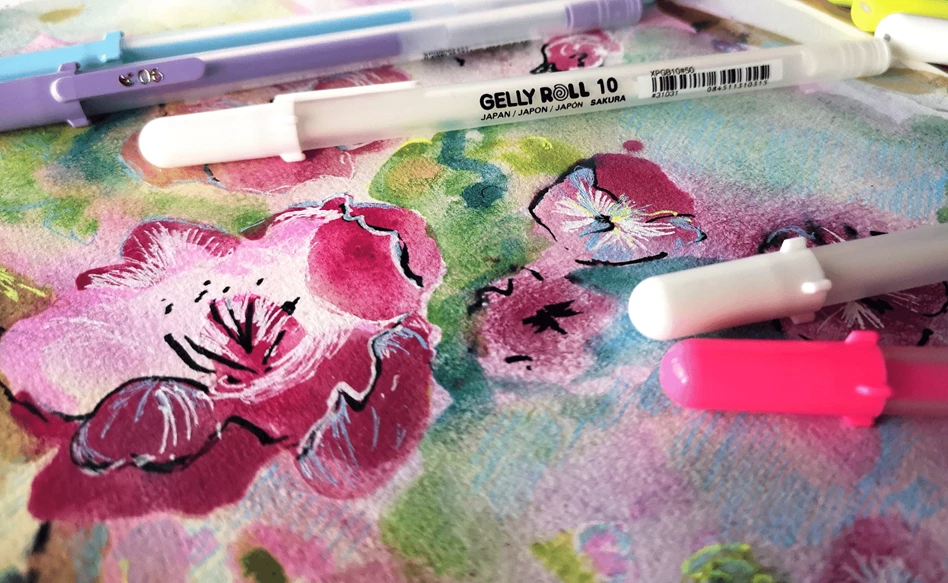
- Sakura Gelly Roll in white, light blue and fluorescent pink
- Rembrandt water colour paper 24 x 32 cm
- Kitchen salt
Step 1
Wet your paper using the Koi water brushes included in the Koi water colour set. Select your colours, Justyna used light blue, pink and yellow to create soft pastel colours, but you can choose any combination of colours you like. Let the paint flow freely and allow some drops of paint to fall off your brush to create dots in the wet paint. These will become your flowers.

Step 2
To create some interesting texture, you can opt to put some grains of salt on your paper while the paint is still wet. Justyna used kitchen salt which resulted in small dots, but you can create a more dramatic effect using coarse salt. Let the paint dry completely and brush the salt off.

Step 3
Add details to emphasize the flowers and the branches. Don’t worry about being too accurate, just create some more patches of colours. Let this layer dry completely as well.

Step 4
Outline the flowers and branches with black lines using the Koi brush pen. You don’t have to follow the lines of the dots you created; you can choose wherever you want the petals to be.
Add some texture and depth to the background using pastel coloured brush pens. To create a more abstract effect, you can dilute the pastel coloured lines in the background with water. Let everything dry.

Step 5
Use the white Gelly Roll pen to add some final details. You can use other colours as well, of course. Justyna also used some blue lines in the background to accentuate the flowers in front of a blue background.
Now your flower water colour painting is complete! Let us know if you try out something like this by sharing it online using #RoyalTalens. Have fun playing with water colours!

Other step-by-step plans with watercolours

Easy Christmas illustrations
By Trine Holmvard and Gitte Klausen

Heda's still life in Van Gogh water colours
Step-by-step plan
Sumo wrestler
Step-by-step plan
Loosely painted flowers
Step-by-step plan