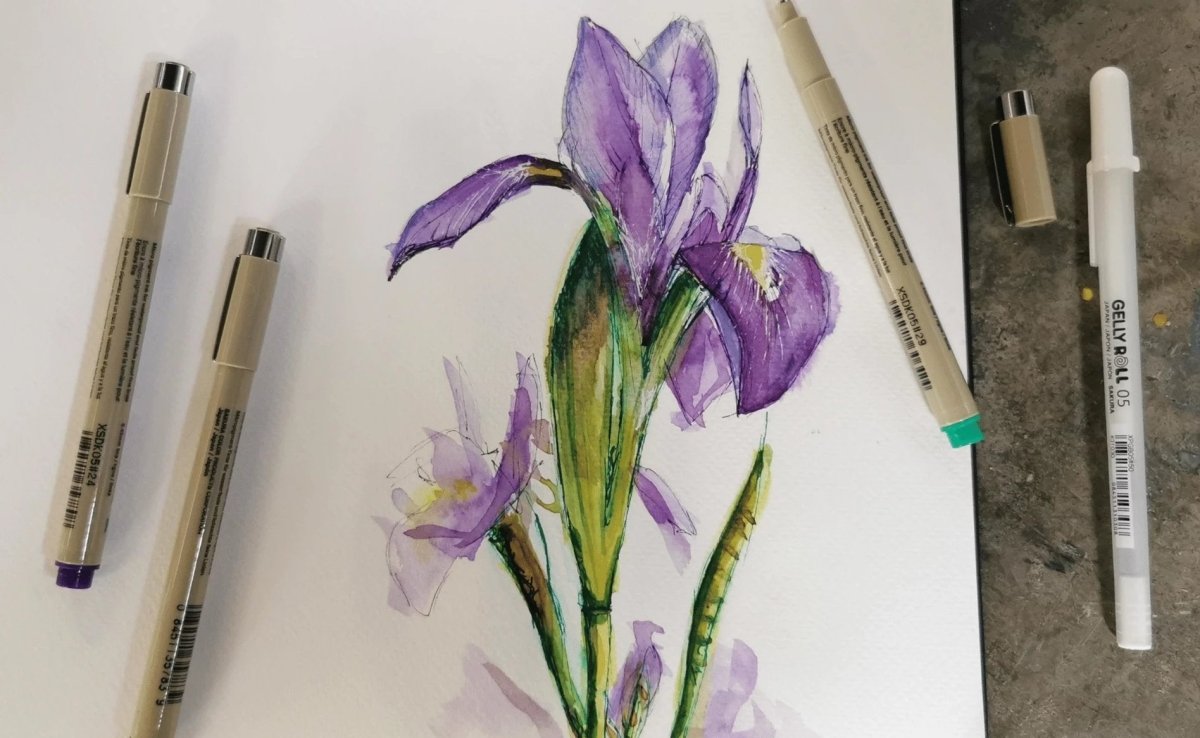
In this step-by-step plan, Siona shows us how to create an iris painting, using coloured Sakura Pigma Micron fineliners and Van Gogh watercolours. Learn how to construct an iris flower and how to create beautiful colour transitions.
Sakura Pigma Micron fineliners 05 in various colours
Van Gogh watercolour pocket box in Pinks & Violets and Shades of Nature
Van Gogh watercolour brushes
Sakura Gelly Roll in white
Step 1
Choose and sketch your reference photo
Pick a reference photo of the flowers you want to draw or better yet, take a photo yourself. Siona decided to draw irises, as those were in bloom at the time.
Now sketch your flowers onto the paper using different colours of the Pigma Micron fineliners. In this case, Siona used green for the stem and purple for the flower itself, but it of course depends on the flower you choose to draw.
Step 2
Add some water to your paper
Wet your watercolour brush with clean water and apply the water to the areas you want to paint. If you don’t want the lines of the fineliners to bleed, make sure you wait for the Pigma Micron ink to dry completely.
Step 3
Now you can start applying your watercolours
Start with the darkest part of the leaves and dry your brush. Spread out the paint you just applied using your dry brush, this ensures you get a beautiful colour transition without applying too much paint. Use two or three different colours to add some interesting dimension to your painting. Remember that you don’t have to add colour to every single part of the flower, it works better to keep parts white.
TIP: Did you accidentally apply too much paint? Clean and dry your brush and go over the area that has too much colour. If the paint is still wet, the brush should absorb it. You could also use a dry paper towel, but this doesn’t offer the same level of control.
Step 4
Work in layers
Even though watercolours aren’t waterproof, you can still work in layers! Wait until your paint has dried completely before carefully applying a second layer with little water.
Step 5
Add highlights and details
Add some finishing touches using fineliners for definition and shade. Use the white Gelly Roll to apply some highlights and fine lines.
Step 6
This completes your botanical watercolour painting! We hope this tutorial inspires you to try recreating your favourite flowers! If you do try this out, don’t forget to share your results using #RoyalTalens, we would love to see your creation!