3D decorated notebook
Get creative in 3D! With our Effect liners, you can create three dimensional lines, dots and pearls on almost every surface. In this step-by-step plan we’re showing you how to use them to personalise your own notebook.
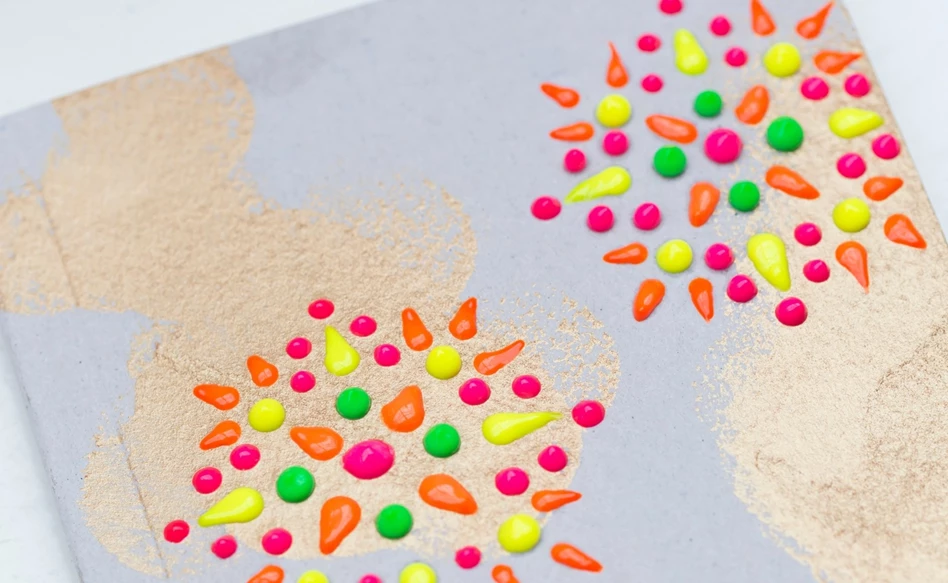
Want to add more to your covers? We’ve added some Metallic paint to ours with a sponge stick for a cool effect. The Metallic paint has a drying time of only 10 minutes, so it’s the perfect paint to work with when you’re using multiple products.
What you need
- Talens Art Creation Metallic
- Talens Art Creation Effect liner neon colours
- Sponge stick
- Toothpick
- Notebook
Tips
- After use, clean the sponge stick immediately with water
Step 1
Shake the metallic paint before use. Use the sponge stick to add the metallic paint to the notebook. Let it dry for 10 min.

Step 2
Shake the Effect liners before use. Press softly to add small pink and orange pearls to the notebook. Use the toothpick to change the shape of the pearls. For example, to make a teardrop, put the toothpick in the centre of a newly made pearl and drag it to one side.

Step 3
Add another circle of yellow and green pearls.

Step 4
You can use the different colours to decorate the rest of your notebook. Once finished, leave to dry for 24 hours.

Other Deco & Craft ideas


5 DIY Mother's Day Gifts
Step-by-step plan
DIY holiday sign
Step-by-step plan
DIY wintery flowerpots
Step-by-step plan