5 DIY egg decorations
To celebrate the coming of spring we gathered our 6 favourite egg DIYs. Using different techniques like painting, writing and dipping, you can create lovely and unique Easter decorations. Each DIY is quick and fun to make and can be modified to fit your personal preference. Maybe switch out the elegant black for a soft pink, or combine two DIYs into one? Anything goes!
Easter Wreath
This wreath is perfect for Easter! It's beautiful, floral, and not at all difficult to make. In all our projects, but in this on in particular, you can exchange any item and make this wreath truly your own.
Start by winding the Eucalyptys and Willow Catkins around the wreath using iron wire. Then split the eggs in half and paint them with a sponge stick using Vintage Chalk and Metallic paint. Details can be added with Effect Liner. Let that dry for 30 minutes. Glue the eggs and any other decorations to the wreath and fill the eggs with daffodil bulbs. Happy Easter!

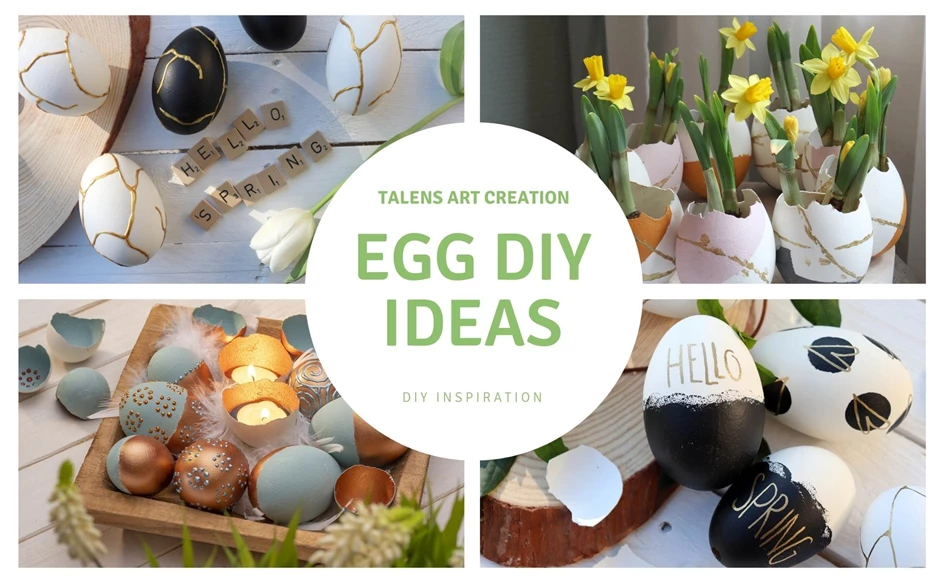
Kintsugi
Kintsugi is the Japanese technique of repairing broken pottery with golden lacquer. Instead of hiding the cracks, it highlights them and makes them beautiful. Thankfully there is no need to break the eggs to get this effect!
Simply paint the eggs black or white using our Indoor & Outdoor paint and let that dry for 30 minutes. Then use the Effect Liner to create the squiggly lines. You can hang the eggs so they can dry thoroughly without smudging the Effect Liner. And that’s it!

Vintage
With our Vintage Chalk paint you can transform simple wooden eggs into lovely Easter decorations.
The paint is very opaque and dries matt, giving it a vintage-look. Combine it with Metallic paint and Effect Liner to create a nice contrast in textures. You can use a sponge stick for even coverage. Be sure to shake the paints well before use and have fun!

Doodles
You can’t go wrong with a combination of black, white and gold! These designs are classy and fun and fit into every interior.
To create these designs, you paint the eggs using Indoor & Outdoor paint and a sponge stick. The sponge creates a playful textured edge. Let the paint dry for 30 minutes. Now for the fun part: use the Sakura Pen-Touch to doodle on the eggs to give them that golden touch!

Flower arrangement
This cute circle of eggs is sure to brighten up your home! Fill it with flower bulbs, dried flowers or even some chocolate easter eggs. It is easy to make with plenty of room for your own creativity!
Carefully empty your eggs from the top and rinse them thoroughly with water. Make sure the hole in the top is big enough. Then use painter’s tape to separate shapes on the eggs and paint them with Indoor & Outdoor paint. For a more interesting texture you can also use Beton Paste. Next, take a piece of rope painted in a Metallic paint. Twist the rope around the egg and take it off again immediately to leave an imprint. Finally, use a hot glue gun to glue the eggs together in a circle and fill it with flowers!

Dips, drips and speckles
This video shows various techniques using Ecoline liquid watercolour and Talens Art Creation acrylic paint. It might get a little messy, but that's half the fun!
Other Deco & Craft ideas


5 DIY Mother's Day Gifts
Step-by-step plan
DIY holiday sign
Step-by-step plan
DIY wintery flowerpots
Step-by-step plan