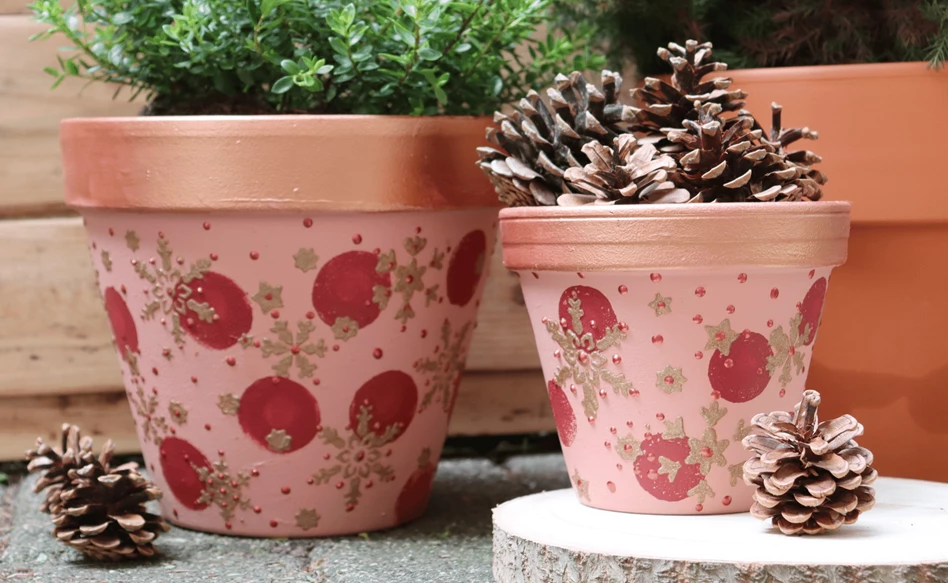
DIY wintery flowerpots
Wondering what to do with your Talens Art Creation Indoor & Outdoor decoration set? Look no further - we’ve got some cute garden inspiration for you!
In this easy step-by-step plan, we show you how you can upcycle your garden accessories, like flowerpots, for instance, using the warm-toned paints, metallics and glitters from the set. Are your ready to add some wintery holiday vibes to your garden or balcony? We know we are! Let’s get started!
What you need
- Talens Art Creation Indoor & Outdoor decoration set
- Paint brush
- Painting knife
- Flowerpots

Step 1
Shake the paint and apply your preferred Indoor & Outdoor colours to the flowerpots using the sponge sticks included in the set. Let it dry for 30 minutes.

Step 2
Take a brush and apply the Metallic paint to the edges of the flowerpots to create a so-called patina effect. This effect makes the metallic part look like oxidised metal.

Step 3
Take the included snowflake stencil and place it on the flowerpot. Use a painting knife to apply the glitter paste to the stencil. This will give you a nice 3D effect because of the thicker layer. Experiment with the placement and size of your snowflakes to create a dynamic design. Let the paste dry for 30 minutes (or longer, depending on the thickness of the layer).

Step 4
Use the Effect Liner to add little decorative pearls or other accents to your design. Let the liner dry completely as well.

After 24 hours of drying time, your flowerpots are ready to be placed outside. Enjoy your own winter wonderland in your garden or on your balcony! Tip: you can also decorate the pot of your Christmas tree this way!
We hope you enjoyed this tutorial and try it out for yourself. If you do, don’t forget to share your results using #RoyalTalens!

Other Deco & Craft ideas

5 DIY Mother's Day Gifts
Step-by-step plan
DIY holiday sign
Step-by-step plan
DIY wintery flowerpots
Step-by-step plan
