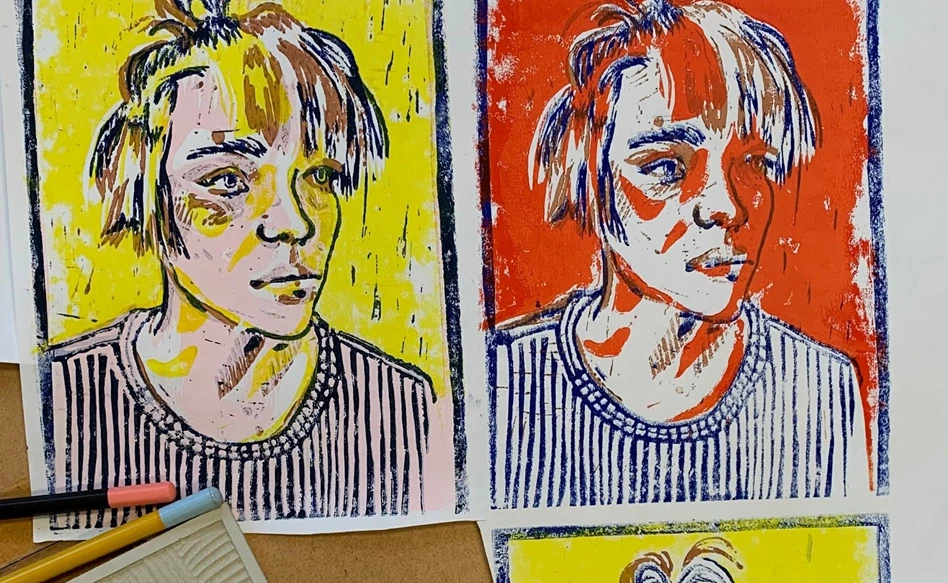
Japanese-inspired lino print
The making of this lino print was inspired by ukiyo-e portraits, a Japanese style of woodblock prints from the Edo period. Ukiyo-e are colourful prints made by carefully carving designs out of plaques of wood and then using different colours of ink to print them on paper.
In this step-by-step plan, we will work with linoleum instead of wood, as linoleum is much softer and easier to work with. To transfer the design to the final paper, we used Talens Blockprint paint. This water-based paint was especially formulated to use for lino prints. Its high viscosity makes sure the edge does not slip when you press it onto the paper and its slow drying time allows you to make multiple prints with one coat of paint.
What you need
- Graphite pencil
- Bruynzeel colour pencils
- Eraser
- Van Gogh Drawing & Sketching paper
- Sheets of linoleum
- Sakura carving tool kit
- Talens Blockprint paint or Talens Art Creation Lino Colour
- Palette knife
- Tear-off palette
- Ink roller
Tips
- Before you start, read through all of the steps.
Step 1
Sketch the drawing you want to transfer onto the linoleum using the graphite pencil and sketching paper. Divide the drawing into different colours with coloured pencils. These colours will be the different layers of your final print, which means you will need a different sheet of linoleum for each colour you choose. We used 5 colours, so we will be using 5 different sheets to print.
Use the first sheet as your base. This first layer should have the overall design on it completely, the other layers are used to add dimension and detail.

Step 2
Now for the most time-consuming part: the carving! Use the graphite pencil to repeat your design onto the first sheet of linoleum. Remember to make your drawing mirrored on the linoleum sheet, especially when incorporating words into your design, since it will be used to stamp the design onto your final print.
Erase the parts you do not want to print from the linoleum using the different carving knives in the carving tool kit. Be careful not to use too much force, or you will damage the bottom of the linoleum sheet. Carve away from your body as to not cut yourself accidentally.

Step 3
Use a palette knife to spread your first paint colour onto the tear-off palette. Spread the paint evenly using the ink roller. Now you can roll the paint onto your design. Make sure to only coat the layer of the linoleum carving that you want to appear on your final print.

Step 4
Carefully press the design onto the block of paper. Make sure to keep your paper on the block while printing it, this provides some extra cushioning to make your print smoother. Remove the linoleum sheet from the paper by carefully lifting it up, starting from one side to make sure the paint does not move.
While your design on the linoleum sheet is still wet, press a blank sheet of linoleum onto it, making sure to line up the edges of the sheets. This will make it much easier to carve out the next layer of your design.

Step 5
While your first print is drying, carve out your second layer based on the design of the first layer. Add extra details if you want to.
Once your print is dry and your second sheet of linoleum is finished, you can repeat the printing process with the next colour. Press the new layer with the different colour onto the dried print and see the dimension it adds to the final piece!
Repeat this process for however many layers you want to use. If a layer only encompasses a small piece of the design, you can also cut it out to make it into a smaller stamp. Make sure not to cut off too much as this will make it difficult to place onto the final print. Leaving at least one of the sides makes it easier to align them correctly. Misaligning a layer, however, can also create a fun, dynamic effect in some cases. Give it a go in one of your prints if you want to try out a different style!

Step 6
If you want to add a background, press the wet print of the first full design onto a blank linoleum sheet so you know where to carve. Now carve out the design to create a stamp for the background. You can leave out areas in the design as well for an interesting effect.

Step 7
Now that you have finished all the carvings of the layers, you can make as many prints as you like. Just make sure to wash and dry the linoleum sheet between each print as to not mix the colours.
Have fun trying out different colours and combinations! If you try this tutorial, share your results using #RoyalTalens, we would love to see them!

Other Deco & Craft ideas


5 DIY Mother's Day Gifts
Step-by-step plan
DIY holiday sign
Step-by-step plan
DIY wintery flowerpots
Step-by-step plan