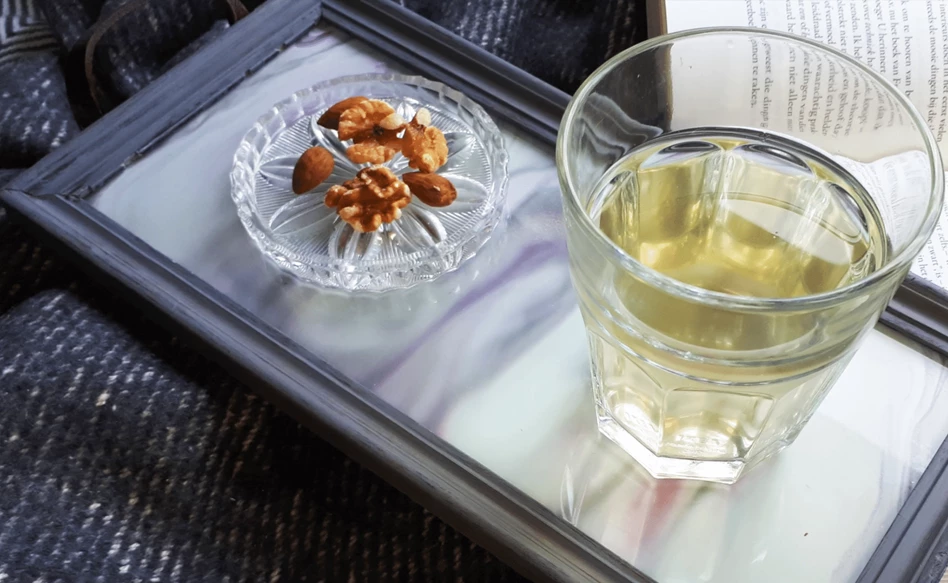
Serving tray
Acrylic pouring can not only be used to create a lovely piece of art for your wall but to create accessories for your home décor as well! In this step-by-step plan we will show you how to create this beautiful handmade serving tray with a picture frame, some handles and acrylic pouring!
Add this colourful handmade piece to your own home or gift it to someone! Use the tray as a toiletry dish in your bathroom, a serving tray for drinks and snacks or to display some of your favourite items on. Have fun creating your own version!
What you need
- Wooden picture frame
- Amsterdam acrylic paint
- Amsterdam pouring medium
- Water
- Cups
- Stirring sticks (e.g., popsicle sticks)
- (Kitchen) torch
- Gloves
- Plastic to cover your workspace
- Handles
- Drill/screwdriver
Step 1
Start by preparing your workspace by covering it with plastic and taking the glass panel out of your picture frame. Place the glass panel on top of some empty cups so it is elevated. This allows the paint to freely flow off the sides when we start pouring.
Now you can start mixing your pouring paint. Pour the pouring medium into different cups and add the acrylic colours you want to use. Add water to thin the paint and then stir each cup well with the wooden sticks.

Step 2
Grab an empty cup and add your colours in any order you like until your cup is half full. Mix your paint very slightly with a wooden stick. Be careful not to mix the colours together too much!

Step 3
Put your gloves on and gently pour the cup with your different colours of paint onto the glass panel. You do not have to work in a certain pattern.

Step 4
Lift the glass and gently tilt it in different directions to spread out the paint. Do this until you are satisfied with the results and then place the panel back onto the cups.

Step 5
Use the torch to pop the air bubbles that formed during the pouring.
Now let the paint dry. Because we used a pretty thick layer of paint, it will take two days for it to dry completely.

Step 6
Once the paint on your glass panel has dried completely, you can turn it over to see the final result! By putting the panel back into the frame with the painted side down, the glass will protect the paint when you start using the tray.

Step 7
Attach handles to the sides of your picture frame to make it into a serving tray. We used two leather straps to create our handles, but you can of course add premade handles as well.

Step 8
Enjoy your new, homemade tray! We hope you enjoyed this tutorial. If you create your own version, please let us know by sharing a picture using #RoyalTalens. We would love to see your creation!
This step-by-step plan was created by our wonderful colleagues from the Royal Talens Experience Centre!


