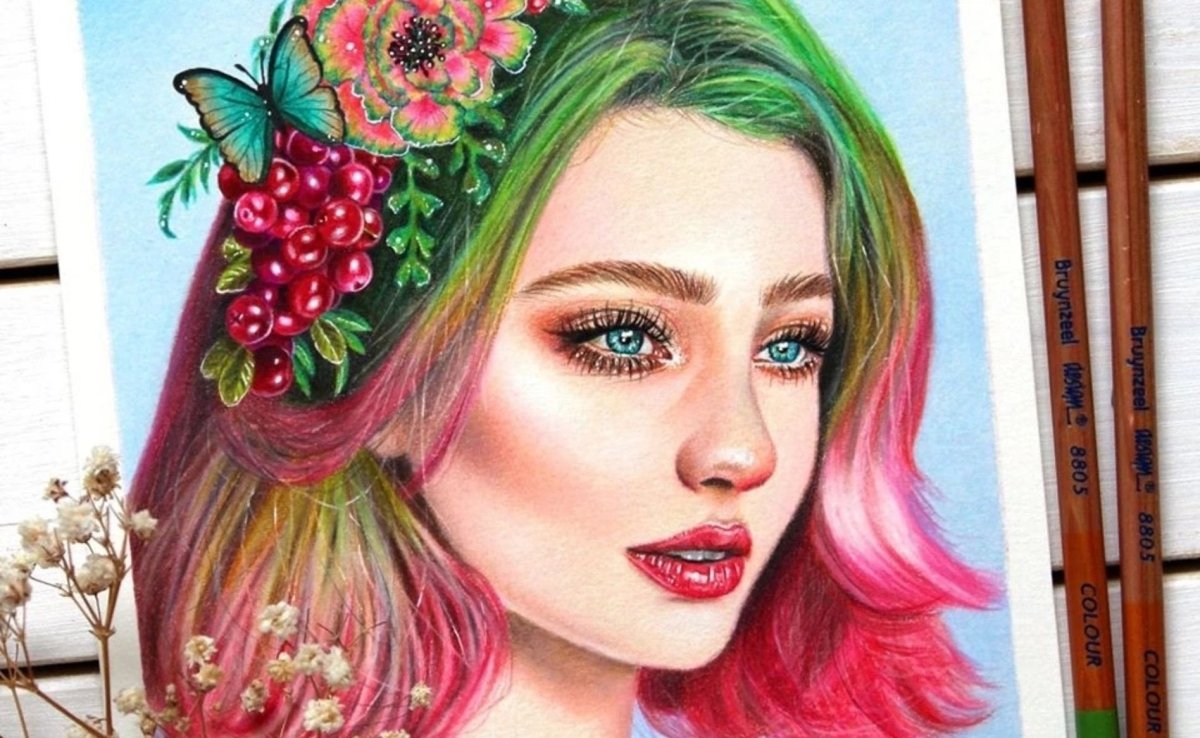
Portrait drawing - Royal Talens

What you need

  • Cotton white paper (180 g/m²)
  • Graphite pencil
  • Bruynzeel Design colour pencils
  • Bruynzeel Expression colour pencils
  • Sakura Gelly Roll gel pen in white 05
  • Sakura Pigma black fine liner
  • Pencil sharpener
  • X-Acto knife to scrape out some details  

Tips

  • To make this plan a little easier to follow, we divided the artwork into three parts: the face, the hair and the flower hair accessory.
  • Work slowly and in layers, this will give you the most realistic effect.
  • Make sure your pencils are sharpened very well, especially when drawing eyelashes, details on the lips and other fine lines.
  • For this specific skin tone, I burnished with a white pencil, since the model is very pale.
  • Use greys combined with browns instead of black for the shadows on the face to add a natural-looking depth to the skin.
  • If you need more help with the blending on a more textured surface, you can always use odourless solvents to melt the colour, especially after the first layers.

Step 1

First layer for the skin

I usually start a portrait by making a rough sketch using the graphite pencil. I measure the proportions from the reference photo on my computer. It doesn’t have to be exact, but if you want to draw a relative, friend or a celebrity, I suggest using the grid method to make sure the proportions are correct.

Switching to the coloured pencils, I start with the eyes. I select colours that are similar to the colours in the reference picture and add the details. I used Bruynzeel Design colour pencils in no. 75, 70, 38, 31, 18, 71, 51, 55, 73, 01, 10 and Bruynzeel Expression colour pencils in no. 750, 751, 717, 718, 757, 714, 733, 742, 732 for the face.

Step 2

Add the lips

As I continue to work on the skin around the eyes, I start filling in the nose and cheeks as well. For paler skin tones, like the one in my reference photo, I choose pale colours like peaches, pinks and whites. If the skin is darker, I switch to browns, ochres and earth reds.

Step 3

Add blush and contour

Now, let’s add blush and contour. Make sure to preserve the highlights on the cheekbones, that makes it easier to accentuate them using the white pencil afterwards. Always use light strokes and layer your colours for a seamless blend. After that, I draw details on the lips and eyebrows and then add light freckles and moles using light browns to make the skin look more realistic.

Step 4

Start on the hair

The hair needs quite a bit of attention as well, since hair is usually the most difficult part to recreate realistically. Do not stress on individual hairs just yet, try to work on strands and work on one section at a time.
It is important to add details to make the hair more realistic, like highlights where the hair is shiny and lowlights where the hair is darker or in the shadows, especially at the roots.
I used Bruynzeel Design colour pencils in no. 60, 19, 71, 38, 31, 61, 10, 01 and Bruynzeel Expression colour pencils in no. 771, 756, 723, 755, 725 for the hair.

Step 5

Add "fly-aways" for the hair

I also love adding stray hairs, or so-called “fly-aways”, because it gives the hair a more realistic look. I use an X-Acto knife or something else sharp to scrape the pigment off the paper and reveal the white of the surface, giving the impression of small hairs. I use this trick for the lips as well, and the fine lines under the eyes. Be careful though, if there is not enough pigment on the paper, this technique will not work, and you will only end up damaging the surface.

Step 6

Draw the hair accessory

Now onto the flower hair accessory. Some colourful and vibrant elements to offset the smoothness of the skin will make your artwork even more interesting. If you are not patient with drawing flowers and/or butterflies, you can just stick to a simple portrait.
I used Bruynzeel Design colour pencils in no. 31, 38, 71, 60, 62, 46, 10, 63 and Bruynzeel Expression colour pencils in no. 709, 725, 714, 756, 725 for the hair accessory. The white Gelly Roll gel pen and black Pigma fine liner are very helpful here as well, to add light reflections and enhance contrast by creating shadows.

Step 7

Colour the background

Lastly, I colour in the background. For this I used Bruynzeel Expression colour pencil in 742 and Bruynzeel Design colour pencil in 01.

And that’s it! We hope you enjoyed the process and share your result with us using #RoyalTalens! This wonderful step-by-step plan was made for Royal Talens by Alexandra Zeres (@alexandra.zeres.art).

Related blogs

Bruynzeel neon pencil set: - Royal Talens
Drawing with pencils

Bruynzeel neon pencil set:

Wow! The Bruynzeel neon pencils really pop out of their black casings and produce beautiful, bright colours on white paper....
Using the right pencil sharpener - Royal Talens
Drawing with pencils

Using the right pencil sharpener

There are two different types of pencil sharpeners: one for graphite pencils and one for coloured pencils. The importance of...
Drawing your own board game - Royal Talens
Drawing with pencils

Drawing your own board game

Drawing your own board game? Once you’ve coloured all the pictures from our fruit colouring page, you can use them...
Create a Frida Kahlo inspired drawing - Royal Talens
Drawing with pencils

Create a Frida Kahlo inspired drawing

In this blog post, Lieve Merlijn will guide you through a simple, step-by-step plan to create a drawing inspired by...
Portrait in primary colours - Royal Talens
Drawing with pencils

Drawing a portrait in primary colours

In this step-by-step plan, we show you how you can use primary colours to create depth and contrast in a...
Kingfisher Drawing - Royal Talens
Drawing with pencils

Drawing a kingfisher

Learn how to create your own colourful kingfisher using sketching and layering techniques. Let’s get started!
Drawing with shadow - Royal Talens
Drawing with pencils

Drawing with shadows

In this step-by-step plan, we will show you how you can add light to a drawing by creating shadows. Using...
Drawing perspective - Royal Talens
Drawing with pencils

Drawing perspective

Have you ever tried drawing a building or street, but not quite getting the perspective to look right? With this...