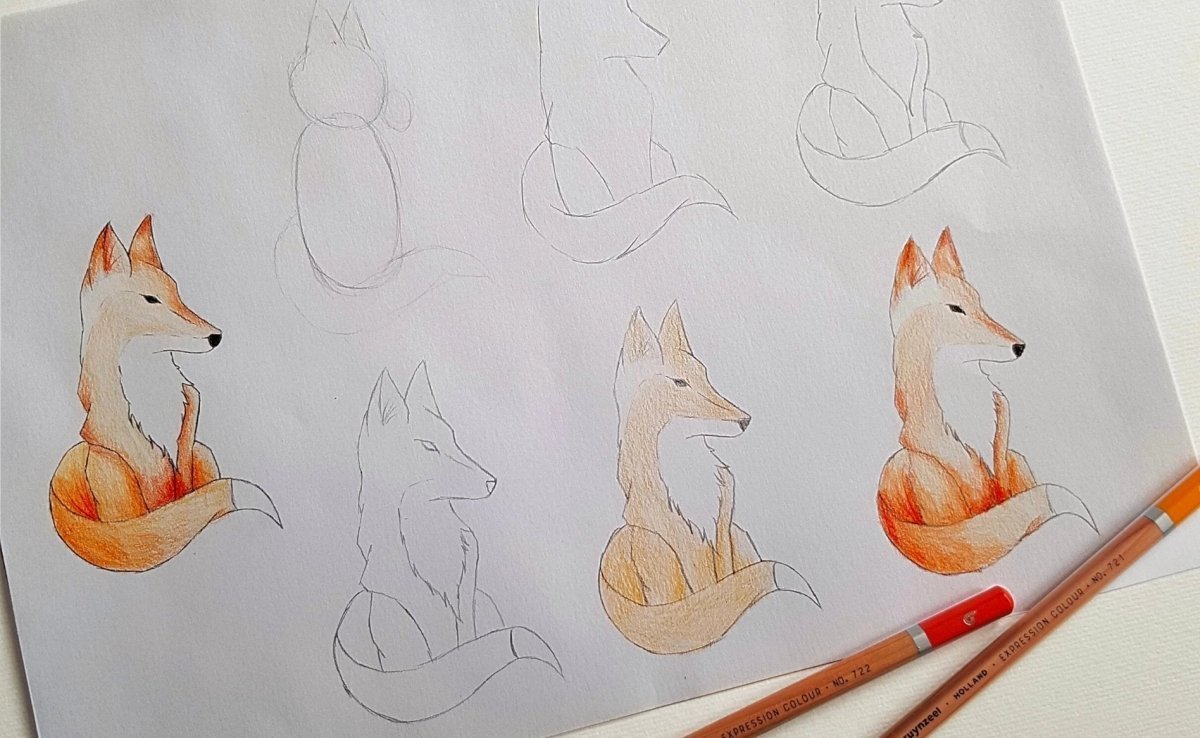
Bruynzeel Expression colour pencils in: dark orange, light orange and black
White paper
Step 1
Start with a sketch.
Use the HB graphite pencil to draw the global lines of the fox. Use round shapes for the belly, head and snout, triangular shapes for the ears and two wavy lines for the tail coming together at the end.
Step 2
Connect the shapes.
Make the shapes rounder by connecting the rough lines and erase overlapping auxiliary lines. Sharpen the snout and add two half round shapes to the belly, these will be the legs.
Step 3
Add some detail.
Make the back and front legs fluffier by making it not perfectly straight, instead make slightly serrated edges. Draw the belly with the same slight serrated edges. Also make eyes, a nose and the tip of the tail.
Step 4
See the fox come to life with more detail!
Add more fur details to the ears and belly. Draw a line from the nose to the eye for a 3D effect.
Step 5
Time to add some colour.
Colour in the fox with the light orange colour and use black for the eyes and nose. Leave the belly and the bottom part of the snout white.
Step 6
Now for the final steps!
Use the dark orange colour to create more depth in the tail, nose, ears and legs. Great job, you finished your fox!
Have you tried making this fox? We would love to see it! Share your drawings with us by tagging @bruynzeel_holland and use the hashtag #stepbystepwithbruynzeel.