Painting Happy Stones - Royal Talens

What you need

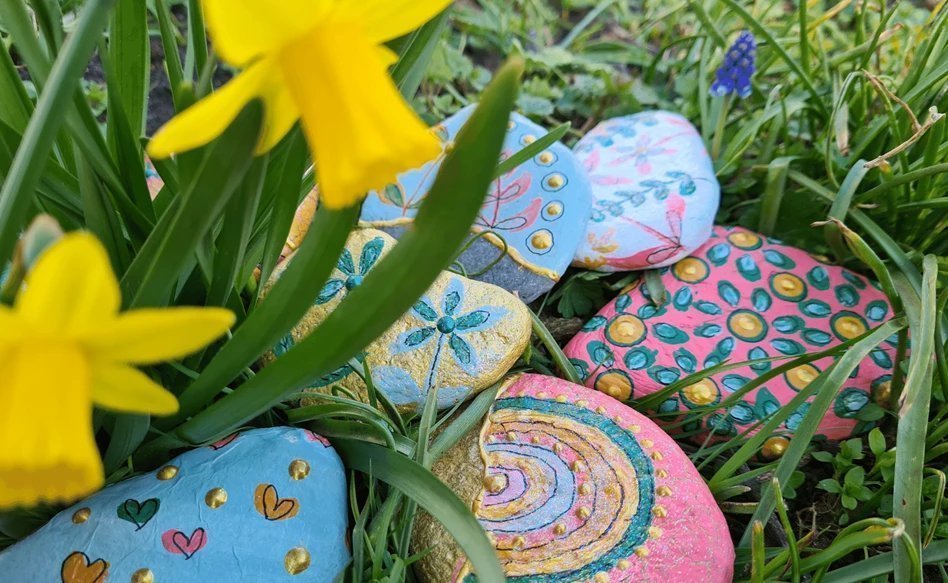
We used Talens Art Creation Indoor & Outdoor paint for a long-lasting colour and then decorated the stones with various other materials, including Effect Liners and if you’re up for it: glitter!

  • Talens Art Creation Indoor & Outdoor
  • Talens Art Creation Effect Liner
  • Talens Art Creation Crackle Medium
  • Talens Art Creation Decoupage
  • Talens Art Creation Lacquer
  • Amsterdam Glitter
  • Sakura IDenti-Pen in black
  • Stones
  • Sponge Sticks
  • Paintbrush
  • Rice/tissue paper

Tips

Pick stones of different shapes and sizes for variation. Don't forget to wash the stones and let them dry before decorating them, this will help the paint adhere to the stone better.

Start with a clean surface

Step 1 - Paint

Use a sponge stick to evenly paint the stones in any colour of the Indoor & Outdoor paint you like. Let it dry for 30 minutes.

Add decorations

Step 2 - Paint

Take a small detail brush to add decorations to your stone using the same Indoor & Outdoor paint in different colours.

Try something different!

Step 1 - Crackle Medium

If you’re looking for an interesting crackle effect, add a layer of the Crackle Medium before adding your first coat of colour. Once the layer is dry, add a coat of Indoor & Outdoor using a sponge stick and let this dry for 30 minutes. To top it off, add another layer of the Crackle Medium and watch the magic happen!

Tip: the thicker the layer of Crackle Medium, the bigger the cracks will be.  

Now add some colour.

Step 2 - Crackle Medium

Once the last layer of the Crackle Medium has dried completely, quickly add another layer of your Indoor & Outdoor colour and let dry. Be quick to apply the paint because the crackle effect sets in immediately.

Go Decoupage!

Step 1 - Decoupage

First, paint your stones in any colour of the Indoor & Outdoor paint using a sponge stick for even coverage.

Decorate your paper

Step 2 - Decoupage

Decorate your tissue or rice paper using a small detail brush and the same paint. Make sure to let it dry completely before moving on to the next step. You can also pick a fun patterned napkin for this method.

Decorate your paper further using the IDenti-Pen to add lines, letters and other details.

Apply Decoupage

Step 3 - Decoupage

Apply Decoupage to your coloured stone and carefully place your tissue or rice paper on top. Make sure the paper covers the stone well and add another layer of Decoupage and let dry for 30 minutes.

3D effect

Finishing steps - All methods

Add a 3D effect using the Effect Liners! This way, you can create dots and lines that really stand out.

Add some details

Finishing step - All methods

  • To add some contrast and detail to the drawings you made using paint, use the IDenti-Pen in black.
  • If you want to give your stone some sparkle, add a layer of clear lacquer and sprinkle some glitter on top!
Add a message or # on the back!

That's it!

Write a # on the back of the stone if you want people to share photos of their found stones! Now you’re ready to hide your stones in your backyard, the neighbourhood or in the forest. Have fun hunting stones!