In this step-by-step plan, Martine shows you how to use masking fluid, Ecoline and bubbles to create a negative-space hand lettering piece. Let’s begin!
Sketch out your design on the paper using your pencil. We went for the text “spring is in the air”, but you can write anything you like!
Step 2
Create a negative space design with masking fluid. Once you are satisfied with your design, carefully cover the text using the masking fluid and let it dry completely. Everything you cover using this fluid will receive a rubbery film. This prevents any colour you use on top from touching these parts of the paper.
The masking fluid will also stick to the hairs of your brush, so make sure to clean your brush regularly while applying using clean water.
Step 3
Prepare your colours and bubble solution.
Now for the fun part: take a bowl, put in a little dish soap and add some water. Make sure to prepare your Ecoline by squeezing your colours into the pipettes of the bottles.
Step 4
Time for some bubbles!
Take a straw and blow bubbles into your dish soap and water solution. Make sure you blow enough bubbles. They should stick out at least 10 cm over the top of the bowl.
Step 5
Let's add some colour!
Use the pipettes of the Ecoline bottle to spread the different colours of Ecoline onto the bubbles. Work quickly and press your paper on top of the coloured bubbles to create your print. Let dry completely.
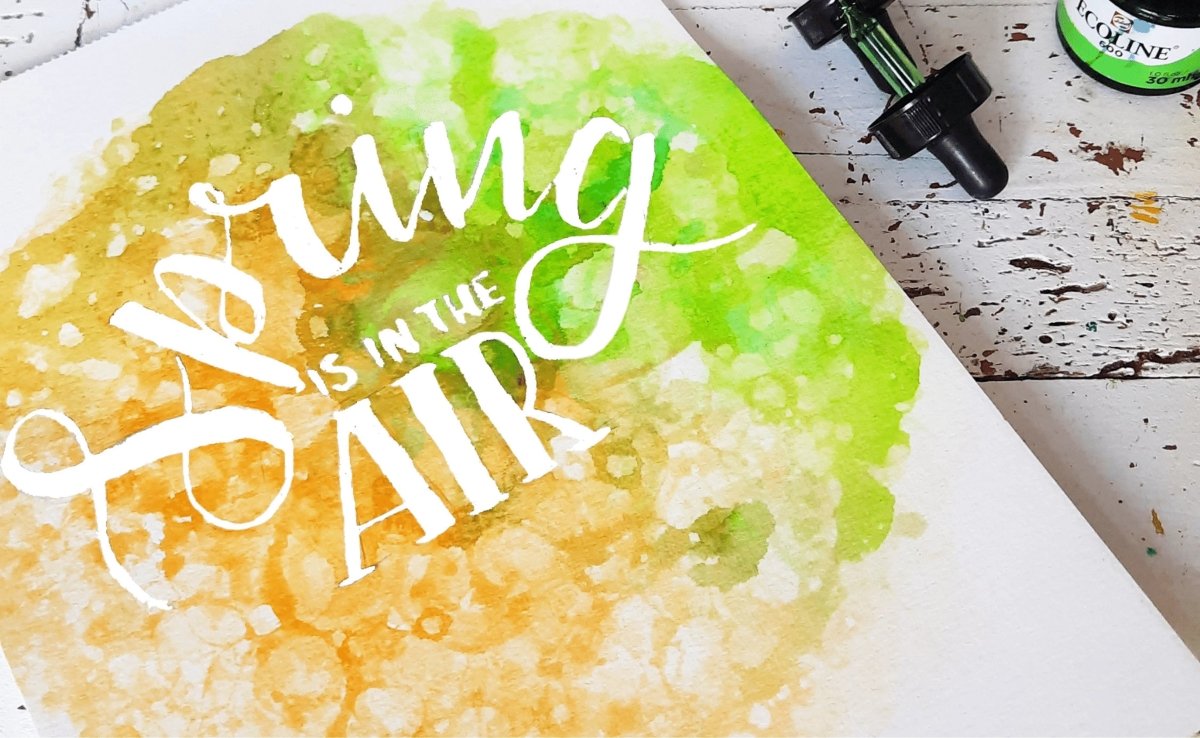
Step 6
Finally, remove the masking fluid and reveal your negative space lettering. Wait until the paint has completely dried and rub off the masking fluid using your fingers or a kneadable eraser.
We hope this tutorial inspires you to make your own colourful hand lettering piece. If you do, please share your results using #RoyalTalens! This step-by-step plan was created by our wonderful colleagues over at the Experience Centre.