Kasuga Taisha in Nara
Nara is a city in Japan near Osaka that is known for its historical buildings, traditional imagery, beautiful landscape and temples. Yet, one of the most noticeable things about Nara is the deer that walk around everywhere. This includes the temple ground of Kasuga Taisha, one of the most famous temples in Nara. The deer are believed to be sacred messengers of the Shinto gods, so they are treated with the utmost respect. Vendors around Nara even sell treats to feed the deer with, which has made them very friendly to humans over the years.
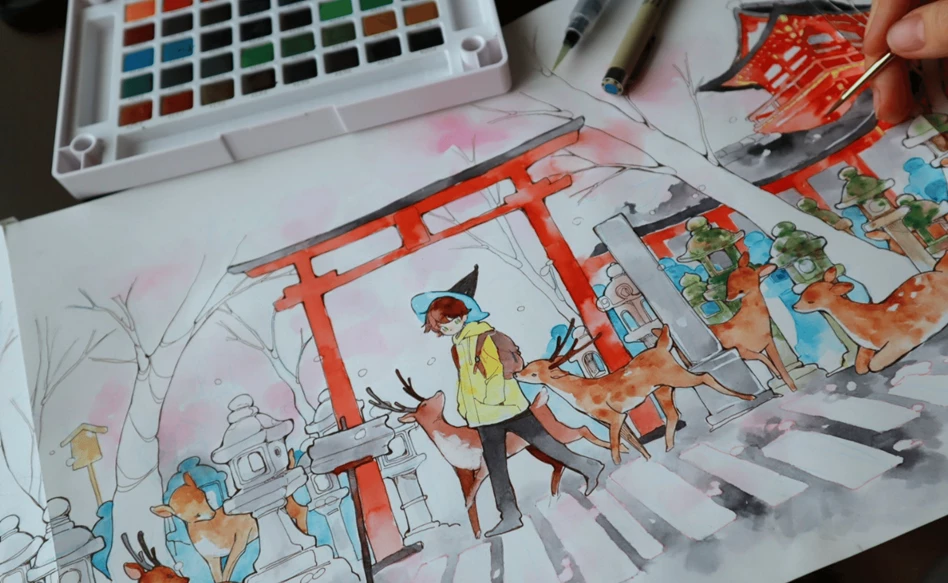
To celebrate the 100th anniversary of Sakura, our Japanese brand, in 2021, we would like to share this beautiful Japan-inspired water colour illustration with you. This drawing depicts a common scene at Kasuga Taisha: deer following people around while they walk around the temple grounds. Get inspired by the dreamy imagery in this step-by-step plan! Don’t forget to have a look at the video at the bottom of the page to see some of the process!
What you need:
- Water colour paper in A3 size
- Graphite pencil
- Eraser
- Sakura Pigma Micron fineliners in various colours
- Sakura Koi Water Colors Pocket Field Sketch Box in 48 colours
- Water colour brushes
- Ecoline brush pens
- Sakura Gelly Roll in white
Step 1
Sketch your drawing with the graphite pencil.
Tip: try sketching different poses for the deer and other elements in a sketchbook before starting on your final artwork. This helps minimize the number of erased lines in your drawing and keeps it neat.

Step 2
Once you are happy with your drawing, trace the lines of your sketch using Pigma Micron fineliners in different colours to compliment your drawing. Now you can erase the pencil lines in the background for a cleaner look.

Step 3
Colour in the background using the Koi water colour set and add details to the background buildings with Ecoline brush pens.
Wet the part of the paper you are working on before adding the water colours and Ecoline to create a smooth colour gradient. For an even more blended effect, use your water colour brush and some water to spread out the pigment.

Step 4
Use the Koi water colour set to add colour, shading and details to the rest of the drawing.

Step 5
Now for some final touches: use Pigma Micron fineliners to add small details to the roofs and the stone lanterns, and then use the white Gelly Rolls to add highlights.

That completes your drawing! We hope this step-by-step plan inspired you to create your own water colour drawing. If you try something like this, let us know by sharing it with #RoyalTalens.
This stunning artwork was created for Royal Talens by Kamerim (@kamerim11)! Check out the video Kamerim made of the process of drawing this illustration below:

Other step-by-step plans with watercolours

Easy Christmas illustrations
By Trine Holmvard and Gitte Klausen

Heda's still life in Van Gogh water colours
Step-by-step plan
Sumo wrestler
Step-by-step plan
Loosely painted flowers
Step-by-step plan