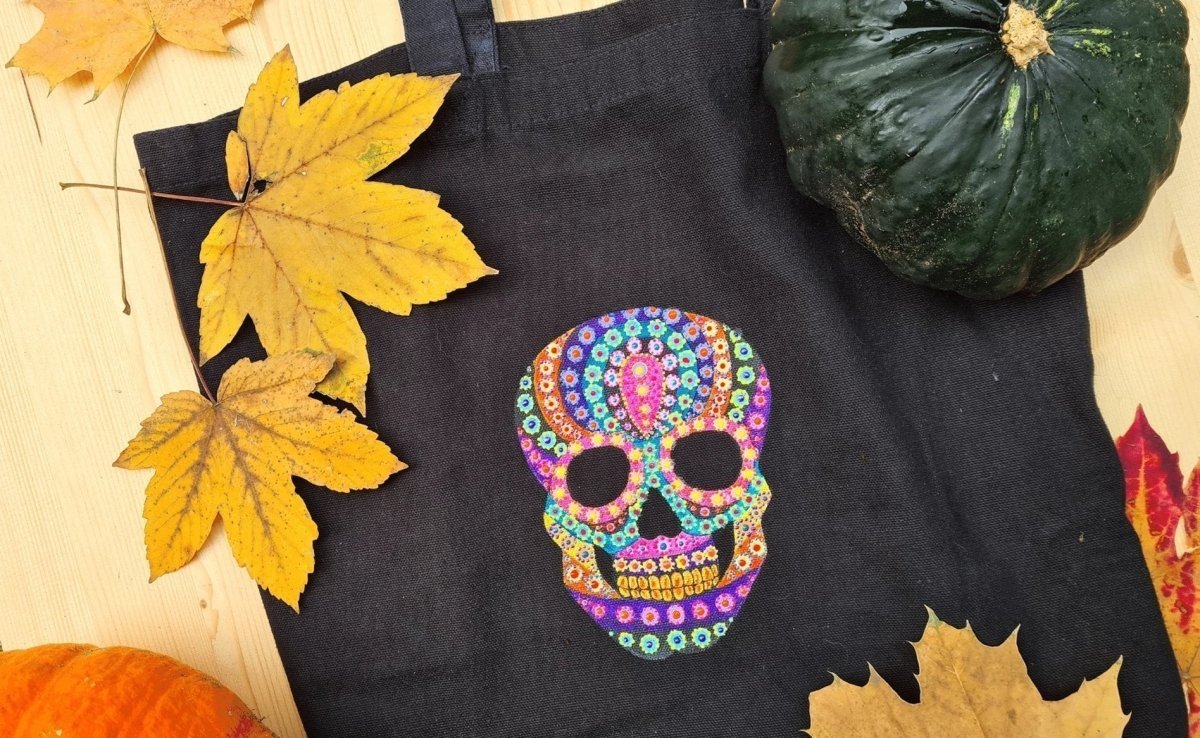
Royal Talens respects the privacy of your information

We use cookies to anonymously analyse and improve your use of our website so that you get a flawless and optimized website. 

Find out more on our cookie page and privacy statement.

Functional cookies ensure that you get an error-free and optimized website.
These cookies are used to tailor advertisements to your interests, both on royaltalens.com and on other websites. They also offer the possibility of making newsletters relevant to you personally.
Social media cookies ensure that you can post comments and share information with your friends and / or your network.
DIY Halloween trick or treat bag
Step-by-step plan

DIY Halloween trick or treat bag

Trick or treat in style with your hand-made trick or treat bag this Halloween! Apply this colourful skull design to a black tote bag with Talens Art Creation Textile paint. Use different sized tools to create an intricate dotted design or create your own scary image! This project is fun to do on your own or with your family.

In this easy step-by-step plan, our colleagues over at the Royal Talens Experience Centre show you how to transform a simple black tote bag into a spooky Halloween-inspired bag. Let’s get into it!

What you need

Tips

  • Use a tote bag with at least 50% organic fibres (like cotton or linen).
  • For the best results, pre-wash the fabric item without fabric softener and let it dry completely before painting it.
  • If necessary, iron the fabric to create a smooth surface to work on.

Step 1

Before starting, make sure to protect your workspace using plastic or a piece of cardboard. The Textile paint may bleed through the fabric, so if you want to work directly on a piece of clothing or bag, use cardboard lined with plastic wrap to put in between the layers of fabric to protect the backside of your project.

Cut the skull design out of the template and use the pencil (or white chalk pencil if you’re using dark fabric) to trace it onto the fabric.

Step 1

Step 2

Paint the skull white using the Textile Opaque paint in Pure White. This will create a perfect base for all your other colours.

Step 2

Step 3

Use a pencil or pen to draw a design on your skull. Feel free to be creative with your design. We used stripes, but you can also try to make flowers or leaves, draw whatever you feel like!

Once you’re happy with the sketch of your design, add some colours to it using the textile paint. Go for bold colours to make your design really pop!

Step 3

Step 4

Use the textile paint to add dots to your design. Look around your home for tools in different sizes to create your dots with. We used an eraser on the back of a pencil for bigger dots, and cotton buds and a bamboo skewer for small dots. Choose a colour that provides a nice contrast with your base colour and add as many dots as you want. Use smaller dots in tight spaces around the edges and let the paint dry completely.

After the paint has dried, you can go in for a second round of dots with a smaller tool in a different colour.

Step 4

Step 5

Once the paint has dried completely, fix the paint using an iron (on cotton setting) with protective paper (such as parchment paper) between the fabric and the iron. Don’t forget to take out the piece of cardboard from between the layers of fabric before ironing! Place it back after fixating the paint and before moving on to the next step.

After heat setting, the item will be washable up to 104 °F/40 °C and suitable for the dryer.

Step 5

Step 6

Now you can add some nice 3D dots using the Effect Liners in different colours. If you haven’t used the Effect Liners before, it might be a good idea to practice on a separate piece of paper before working on your final project. For an optimal 3D effect, hold the tip just above the surface and press the paint out smoothly. By using different amounts of pressure, you can create big and small dots. To create really tiny dots, you can use the skewer again.

Before you can wash the fabric, you need to let your work dry for 24 hours. The Effect Liner cannot be fixated using an iron. Remove the piece of cardboard from between the layers of fabric after letting the paint dry completely. The fabric can now be washed up to 104 °F/40 °C and will be suitable for the dryer.

Step 6

Enjoy your new spooky bag! Are you going trick or treating this year? If you’re taking your home-made trick or treat bag, show us on social media using #RoyalTalens, we would love to see it!

This step-by-step plan was created by our colleagues from the Royal Talens Experience Centre.

Get inspired with more textile ideas