Relaxing kimono patterns
The kimono is a traditional Japanese garment that is still often seen in modern Japan. The garment is shaped like a T with square sleeves and a rectangular body and features a wrapped front. The word kimono is made up of the words ki from the verb ‘to wear’ and mono from the noun ‘thing’, so it literally translates to ‘thing to wear’. Kimonos come in various styles based on occasion, season, gender, age and more! Materials and patterns vary greatly as well.
In this step-by-step plan, we will show you how to create your own kimono-inspired drawing with a focus on different patterns. Relax and lose the stress of everyday life by drawing these therapeutic patterns and create a lovely kimono! You can use this technique to add patterns to your illustrations or on its own. Have fun!
Step 1
Sketch the general shape of your kimono on the water colour paper. The kimono is shaped like a T and has some extra fabric on the collar and the bottom. You can use a ruler if you prefer sharp lines.

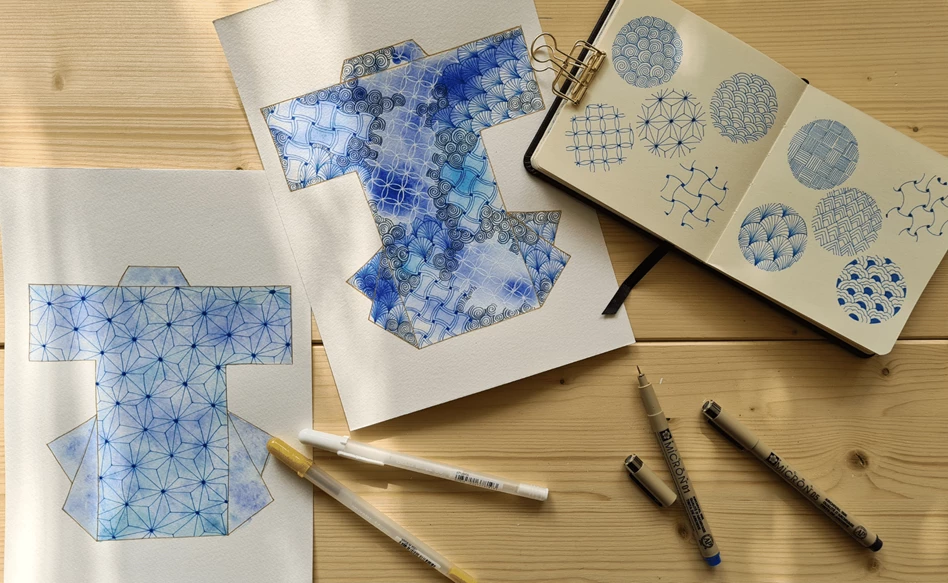
Step 2
Try out some different patterns in a sketchbook or on a separate piece of paper. We went for some classic Zentangle designs, but you can go for anything you like! As long as they are relaxing to draw for you.

Step 3
Use the Koi Water Colors box to add some nice colour blends to your kimono. We went with water-inspired colours, but you can of course make it any colour you like! Just make sure the colours are light enough so that you can still see the patterns you will create on top of them. Let the paint dry completely before moving on to the next step.

Step 4
Pick one or multiple patterns to decorate the kimono. You can start with the mechanical pencil and trace with the Pigma Micron fineliners or, if you are brave enough, go in right away with the Pigma Microns. We used the fineliners in black and blue to match with the base colour of the kimono. Experiment using different nib sizes to create different effects!
For this particular design, we added some final finishing touches using the Gelly Rolls in gold for some shimmer and white for highlights!

Step 5
That completes your kimono design! We hope you liked this relaxing step-by-step plan. Try out different colours and patterns to see which turns out the best. If you try this tutorial, please let us know by sharing it using #RoyalTalens, we would love to see your creation!

Other step-by-step ideas

Drawing a turtle with Ecoline Duotip
Step-by-step plan

Drawing a Japanese beetle
Step-by-step plan

