Drawing shadows
In this step-by-step plan, we will show you how you can add light to a drawing by creating shadows. Using five steps, we will explain how to utilise shadows when drawing a plant. To create this drawing, we used Van Gogh coloured pencils, since they are lightfast, as opposed to other coloured pencils. This means your work will stay in the same condition for years to come, without discolouration!
Step 1
Select an image of a plant from a magazine or print a photo yourself. Colour in the back of the picture with a soft graphite pencil and stick it to the paper using tape. Now trace the contours of the plant with the same pencil. Because of the soft layer of graphite, your image will transfer to the paper. Of course, you can also choose to sketch the image yourself without transferring it.

Step 2
Now you can start adding colour to the drawing of the plant. Select colours that complement each other. We decided to go for Bluish Grey (727), Permanent Red Violet Light (577) and Vermillion (311). Start carefully and patiently colouring in the larger areas and make sure to take the shadows into account. Colour with the shape of the leaves of the plant, this will help accentuate the roundness of the individual leaves.
Tip: sharpen your pencils. Shadows created by bright light have harsh, defined edges.

Step 3
With darker shadows, it may help to deepen the colour using the graphite pencil. Warmer shadows look darker than blue shaded shadows, which is why we opted to add Permanent Blue Violet (568) to some of the shadows when necessary.
Tip: study your shadow closely. There are differences in darkness depending on where you look. By creating differences in colour and layer thickness, you can add more depth to your work.

Step 4
Add colour accents to your plant. If you prefer, you can start adding the colours of the plant in step 2 and 3. The colour accents added in the example are Permanent Red Violet Light (577), Vermillion (311) and Permanent Green Deep (619) for the leaves in the back.

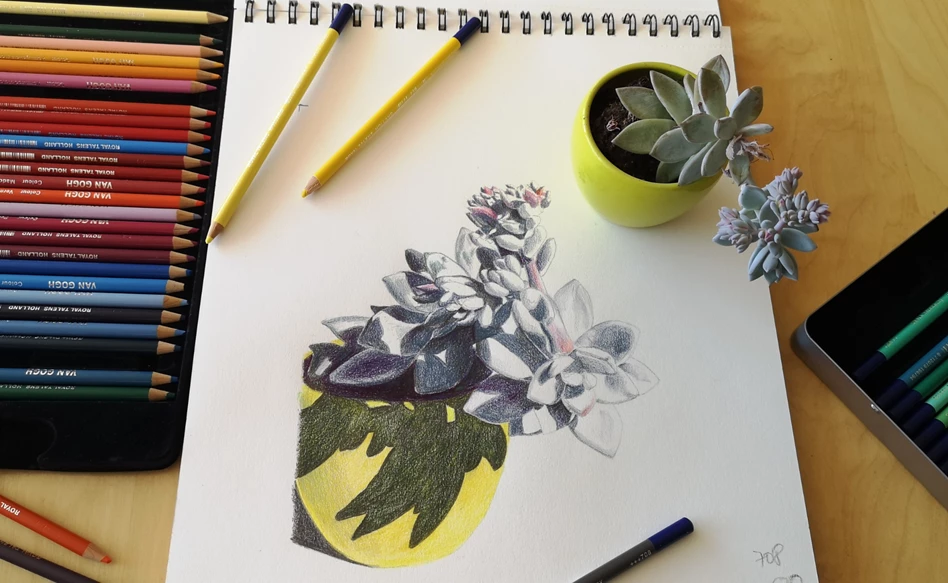
Step 5
When the plant is finished, it is time to add colour to the flowerpot. At first, the shadowy areas on the pot will stay blank. The pot is coloured in using Permanent Lemon Yellow (254) and Permanent Yellow Light (283). The shadows are built in layers using Olive Green (620) and the aforementioned yellow shades.
The shadow of the flowerpot has been darkened using Permanent Blue Violet (568). The corner on the bottom left, which is important to showcase the roundness of the pot, has been accentuated using the colour Payne’s Grey (708).
Variation tip: in this example, we opted to use a more structured paper. This structure will show up in the coloured areas of your work. Do you prefer more even coloured areas? Use a tortillon (paper blending stump) to smooth out those areas or select a smoother type of paper, like Talens Bristol paper for example.
Have fun experimenting with colours and shadows!

Other step-by-step ideas

Drawing a turtle with Ecoline Duotip
Step-by-step plan

Drawing a Japanese beetle
Step-by-step plan

