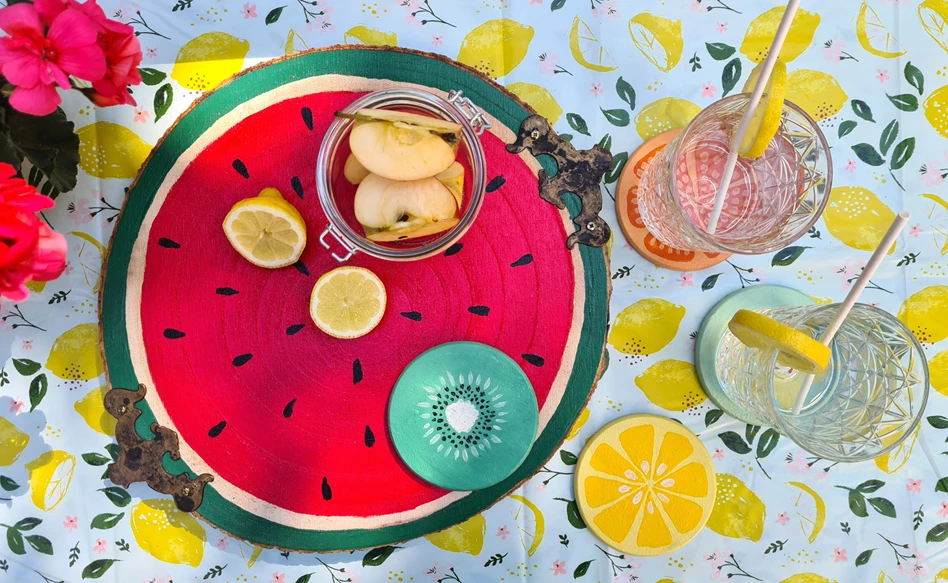
DIY Melon Tray
One of the best ways to spend a sunny afternoon? With a picnic of course! A picnic needs two important things: yummy snacks and drinks, and a cute look. In this easy and fun DIY, we’re showing you how to turn a plain tree disk into this fun and functional melon tray!
What you need
- Talens Art Creation Indoor & Outdoor
- Talens Art Creation Lacquer
- Sandpaper
- Brushes
- Sponge stick
- Tree disk
- Handles
Step 1
Fill the holes or imperfections using a wood filler. Ones it’s dry sand the tree disk using sandpaper.

Step 2
Start by paint the outer line in a green color. Let it dry for 30 minutes.

Step 3
Paint the inner circle red or dark pink. Leave a part between the green and red unpainted. Let it dry.

Step 4
Use black paint to randomly paint the melon seeds. Let it dry.

Step 5
Add 1 or 2 layers of lacquer to protect the paint against stains. This way, the tray is easy to clean.

Step 6
Apply the handles to the tray. You can use whatever you have laying around, like I did.

Step 7
Make sure your tray is balanced when you pick it up by the handles.

Step 8
Enjoy your newly painted, happy tray this summer! And if you really want the perfect picnic vibe, you can also make some cute extra fruit themed coasters.

Other Deco & Craft ideas


5 DIY Mother's Day Gifts
Step-by-step plan
DIY holiday sign
Step-by-step plan
DIY wintery flowerpots
Step-by-step plan