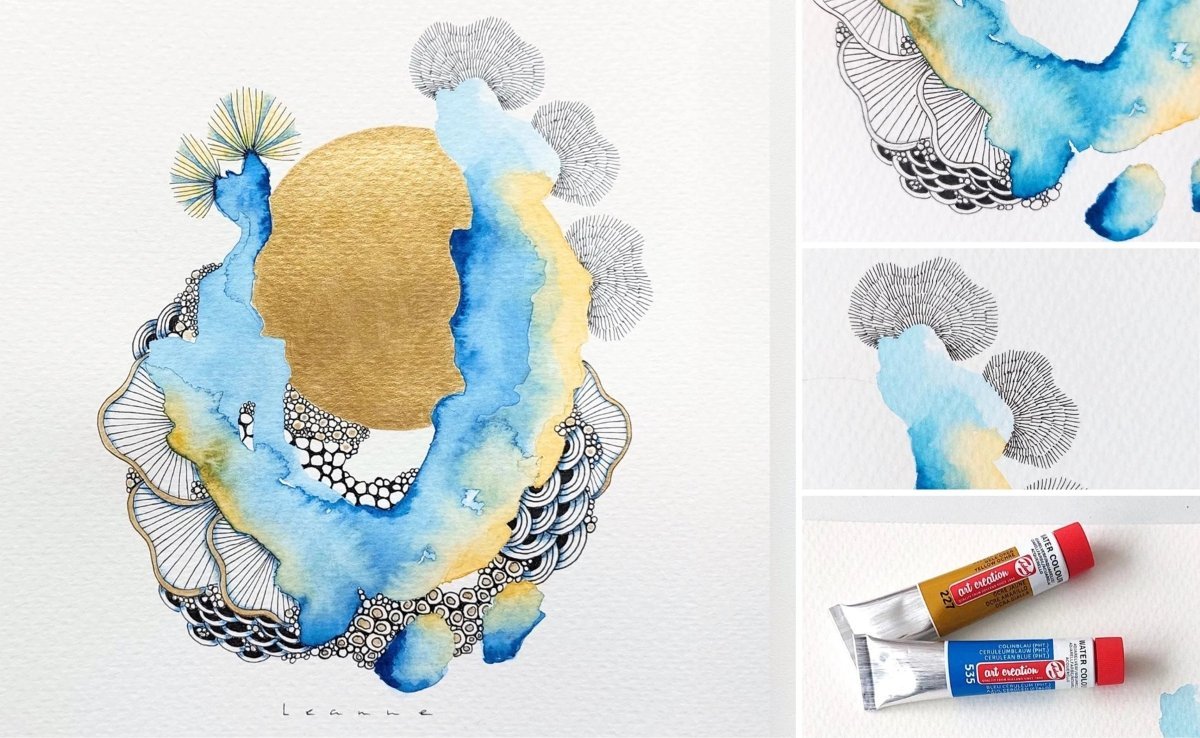
Watercolour with pen drawing - Royal Talens

What you need

  • Watercolour paper
  • Watercolour in Cerulean Blue 535 and Yellow Ochre 227
  • Watercolour brushes 4, 6, & 8
  • Micron pens 1, 3 & 5
  • Graphite pencils B and 2B
  • Colour pencils in Ultramarine Blue 504, Ivory Black 701, Ochre Yellow 227 & Yellow 275
  • Metallic paint Light Gold 8001

Step 1

Take a sheet

Take a sheet of watercolour paper from the block. You can stretch the paper but you don't have to. If you don't stretch it, it will curl up slightly but that's not a problem for this work.

We will work with Cerulean Blue 535 and Yellow Ochre 227. Apply these to your pallet. Use a medium-sized brush that can absorb a lot of water like no 8. Mix some of the blue with lots of water and loosely make a U shape with two dots underneath. Brush no 6 we will use for the yellow. Apply it to the paper and mix some sections with the blue paint while it is still wet. This is the wet in wet technique. Finally, the wet paint is accented with a no 4 brush and concentrated paint. This brush has a nice tip for applying details. You can see how the colours flow nicely into each other.

Once you are happy with how it looks, let it dry. If you have acquired a taste for it, just make another one!

Lastly, draw a circle in the work with a pencil. I always use a glass to trace. This way you can see where you want the circle to be and trace it neatly. We will later paint the metallic colour in the circle.

Step 2

Now it is time to start drawing!

The drawing is based on Zentangle and doodle drawing. We are going to repeat a number of figures, lines and circles. This creates balance in the drawing, but it is also nice for yourself to repeat an action several times. We use micron fineliners in thicknesses 1, 3 and 5. These fineliners are very precise to work with and are fast-drying. This means there's little chance of staining.

We build the drawing around the watercolour. The watercolour forms the guideline for the drawing. This makes it so much fun because you never know what the work will look like: every watercolour is different.

If you find it challenging to get started right away with a fineliner, you can also first sketch the shapes with a soft graphite pencil (B).

Step 3

Add depth and colour

When the lines are ready, add depth and colour by making shadows with coloured pencil. For this we use similar colours as in the watercolour: Ultramarine Blue 504, Yellow Ochre 227, Yellow 275, and Ivory Black 701.

Using a tortillion, we blur the shadows. If you do not have a tortillion, you can also carefully use your fingers or create a light fade with the pencils itself.

Step 4

Finishing touches

In the last step we will paint the large circle with the metallic paint Light Gold 8001. Use a large brush and dilute the paint with a little bit of water to make it flow more easily.

Finally, colour the thin lines of the leaf shapes and the circles with the metallic paint.

The artwork is now finished and I hope you are happy with your result and that you enjoyed doing it!

This tutorial was made by Leanne Buskermolen. Check out her website or follow her on Instagram for more inspiration and lovely illustrations!

Related blogs

Zentangle: what's in it for you? - Royal Talens
Zentangle

Zentangle: what's in it for you?

If you are into drawing and doodling, it is very likely you have heard of Zentangle before. Sakura fans might...
Zentangle patterns - Royal Talens
Zentangle

Zentangle patterns

Zentangle is an engaging art form that uses structured patterns to create stunning abstract designs, promoting relaxation and mindfulness. Watch...
Zentangle as mindfulness | Based art therapy - Royal Talens
Zentangle

Zentangle as mindfulness | Based art therapy

BY MARIEKE SANCHEZIt started on 15 September 2014. I first met the creators of the Zentangle method at the Royal...