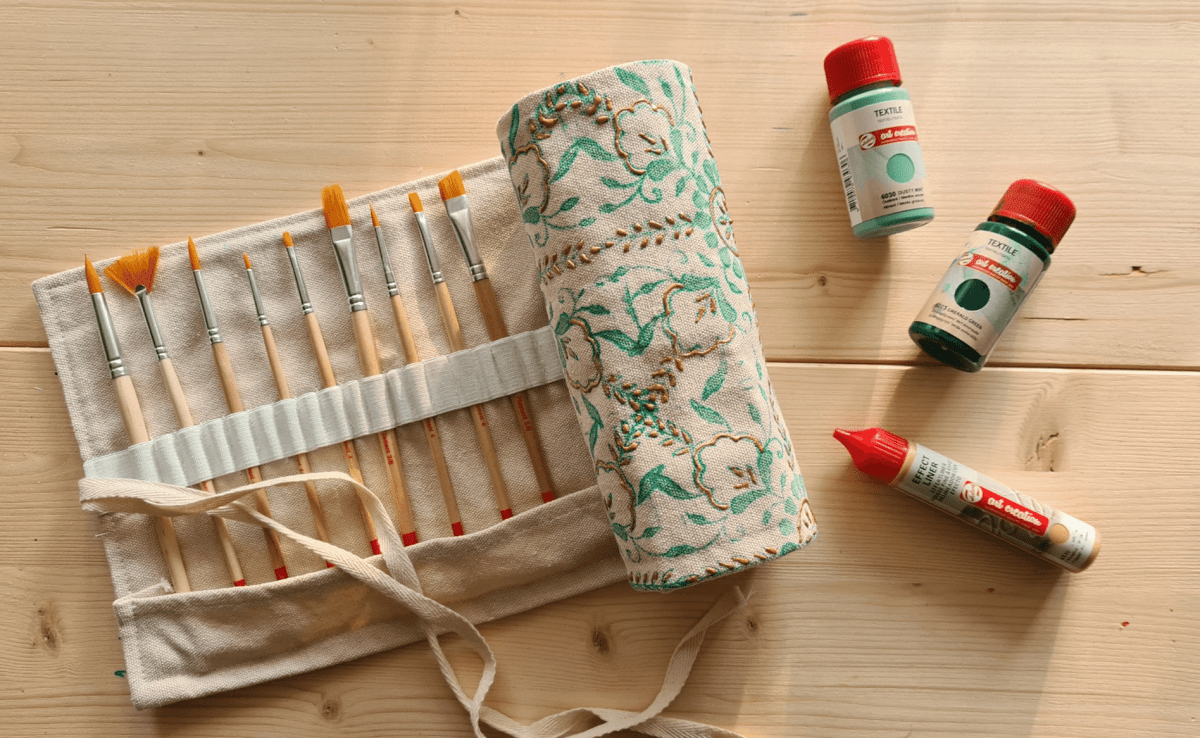
Decorate your own brush holder - Royal Talens

What you need

  • Talens Art Creation Textile Paint
  • Talens Art Creation Effect Liner in Pearl Gold
  • Fabric item (e.g., the Talens Art Creation canvas brush holder)
  • Block print stamp
  • Talens Art Creation tear-off palette
  • Paint roller
  • Brush for details

Tips

The techniques described can also be applied to any other fabric item, like tote bags, shirts, pillowcases, you name it. Use your favourite colours and patterned stamps or create your own design with a brush.

  • Make sure your fabric item is made of at least 50% cotton or another natural fabric. Textile paint does not adhere as well to synthetic fabrics.
  • Wash your fabric without fabric softener before starting, this will help the textile paint adhere to the fabric better.
  • When decorating a tote bag, t-shirt or any other item with two sides, use plastic or parchment paper in between the layers of fabric to prevent the paint from bleeding through.
Pour some of the textile paint onto the tear-off palette.

Step 1

Pour some of the textile paint onto the tear-off palette. Add the paint to your stamp using the paint roller. Put the stamp onto your fabric with the painted side down and press firmly. Repeat this as many times as you need to cover the empty spaces completely. Let the paint dry before moving on to the next step.

Colour in your pattern

Step 2

Colour in your pattern using a small brush and a different colour of the textile paint. We decided to go for a lighter green to compliment the dark green outlines of the pattern. Let dry for 30 minutes.

Once the paint has completely dried

Step 3

Once the paint has completely dried, you can set it using an iron and some parchment paper (baking paper). Iron over the print for 5 minutes to set the paint.

Decorate your print!

Step 4

Now that the paint has set, it is time to decorate your print! We used an effect liner in the colour Pearl Gold to add some shiny accents to the pattern. Effect liners also offer a wonderful 3D effect to make your work stand out more! Let your brush holder dry overnight before using it.

Your personalised brush holder

Step 5

That completes your personalised brush holder! We hope you liked this tutorial. If you try something like this yourself, let us know by sharing it using #RoyalTalens, we would love to see your creation!

Related blogs

Upcycle your clothes with line art - Royal Talens
Painting with textile paint

Upcycling clothes with line art

A cotton canvas is always a good option, but why not try something new? In this tutorial, we’re showing you...
Tree design on fabric - Royal Talens
Painting with textile paint

Creating a tree design on textile

In this video we show you how to create a colourful tree design on a piece of cloth. Have fun...
Pillowcase designs - Royal Talens
Painting with textile paint

Designing a pillowcase

Add some colour to your home décor with these personalised pillows! Get inspired by our 4 video tutorials.
Table cloth with lemon stamps - Royal Talens
Painting with textile paint

Upcycling a table cloth with lemon stamps

With this tutorial, we’re showing you a fun afternoon project to make your garden even more cheerful! With some fruit...
Stencil art on a T-shirt - Royal Talens
Painting with textile paint

Stencil painting on a T-shirt

Stencil the shirt of your dreams! Is this step-by-stap plan we’re showing how to use our Textile Opaque paint to...
Shibori technique - Royal Talens
Painting with textile paint

Shibori technique

Shibori is the Japanese way of dyeing textile. There are countless ways to create the effect. Essentially, any way you...
Make your own totebag - Royal Talens
Painting with textile paint

Decorating a tote bag

In this video, we show you how you can use the textile paint to decorate your own tote bag. We...
Make your own Halloween bag - Royal Talens
Painting with textile paint

Designing a Halloween bag

Trick or treat in style with your hand-made trick or treat bag this Halloween! In this easy step-by-step plan, our...